Free cookie consent management tool by TermsFeed Policy Generator

/dev/blog/ID10T

Advertisement

Nextcloud: Solving slow logins

nextcloud Comments

My wife was complaining about slow logins for our Nextcloud instance. Indeed, while my logins were as fast as expected, her account took over 3 minutes logging in to seeing the Nextcloud Dashboard.

After some internet research I found a thread on the Nextcloud board which recommended checking the auth tokens of the affected user.

That was a good recommendation:

mysql> SELECT uid, count(id) AS nbtokens FROM oc_authtoken GROUP BY uid;
+--------------------------------+----------+
| uid                            | nbtokens |
+--------------------------------+----------+
| m3adows-nextcloud-acc          |       22 |
| my-wifes-nextcloud-acc         |      412 |
+--------------------------------+----------+
5 rows in set (0.00 sec)

Whoops, that’s quite a lot! As the Nextcloud Board user MelwinKfr recommended, I also deleted all her authtokens, as I didn’t care if she had to reconnect her sessions. Beware: This will probably delete all App passwords!

DELETE FROM authtoken WHERE uid = 'my-wifes-nextcloud-acc';
Query OK, 412 rows affected (0.08 sec)

Lo and behold, her login became blazing fast again.

Now, I’m searching for the source of this problem, as it occured multiple times. I suspect it to be Thunderbirds Lightning calendar, but we’ll see about that. I will follow MelwinKfrs advice of using App Passwords for one application after the other to find out which one really was the problematic one.

Change SATA operation mode without Windows reinstallation

windows Comments

As I recently encountered this problem while exchaning the NVMe of a notebook, here’s a quick rundown on how to change the SATA operation mode for a Windows system without the requirement for a reinstallation or an OS repair:

  1. Boot up Windows as normal
  2. Start CMD as admin and run bcdedit /set safeboot minimal to enable safe mode on next boot
  3. Restart the PC and enter UEFI
  4. Now change the SATA Operation mode, in my case from RAID to AHCI
  5. Save the UEFI changes and let Windows boot to Safe mode
  6. Once again open CMD as admin and run bcdedit /deletevalue safeboot to disable safe mode
  7. After another reboot Windows will automatically start with the new drivers enabled

Starting applications before and after running a Steam game

Steam, Gaming, Windows Comments

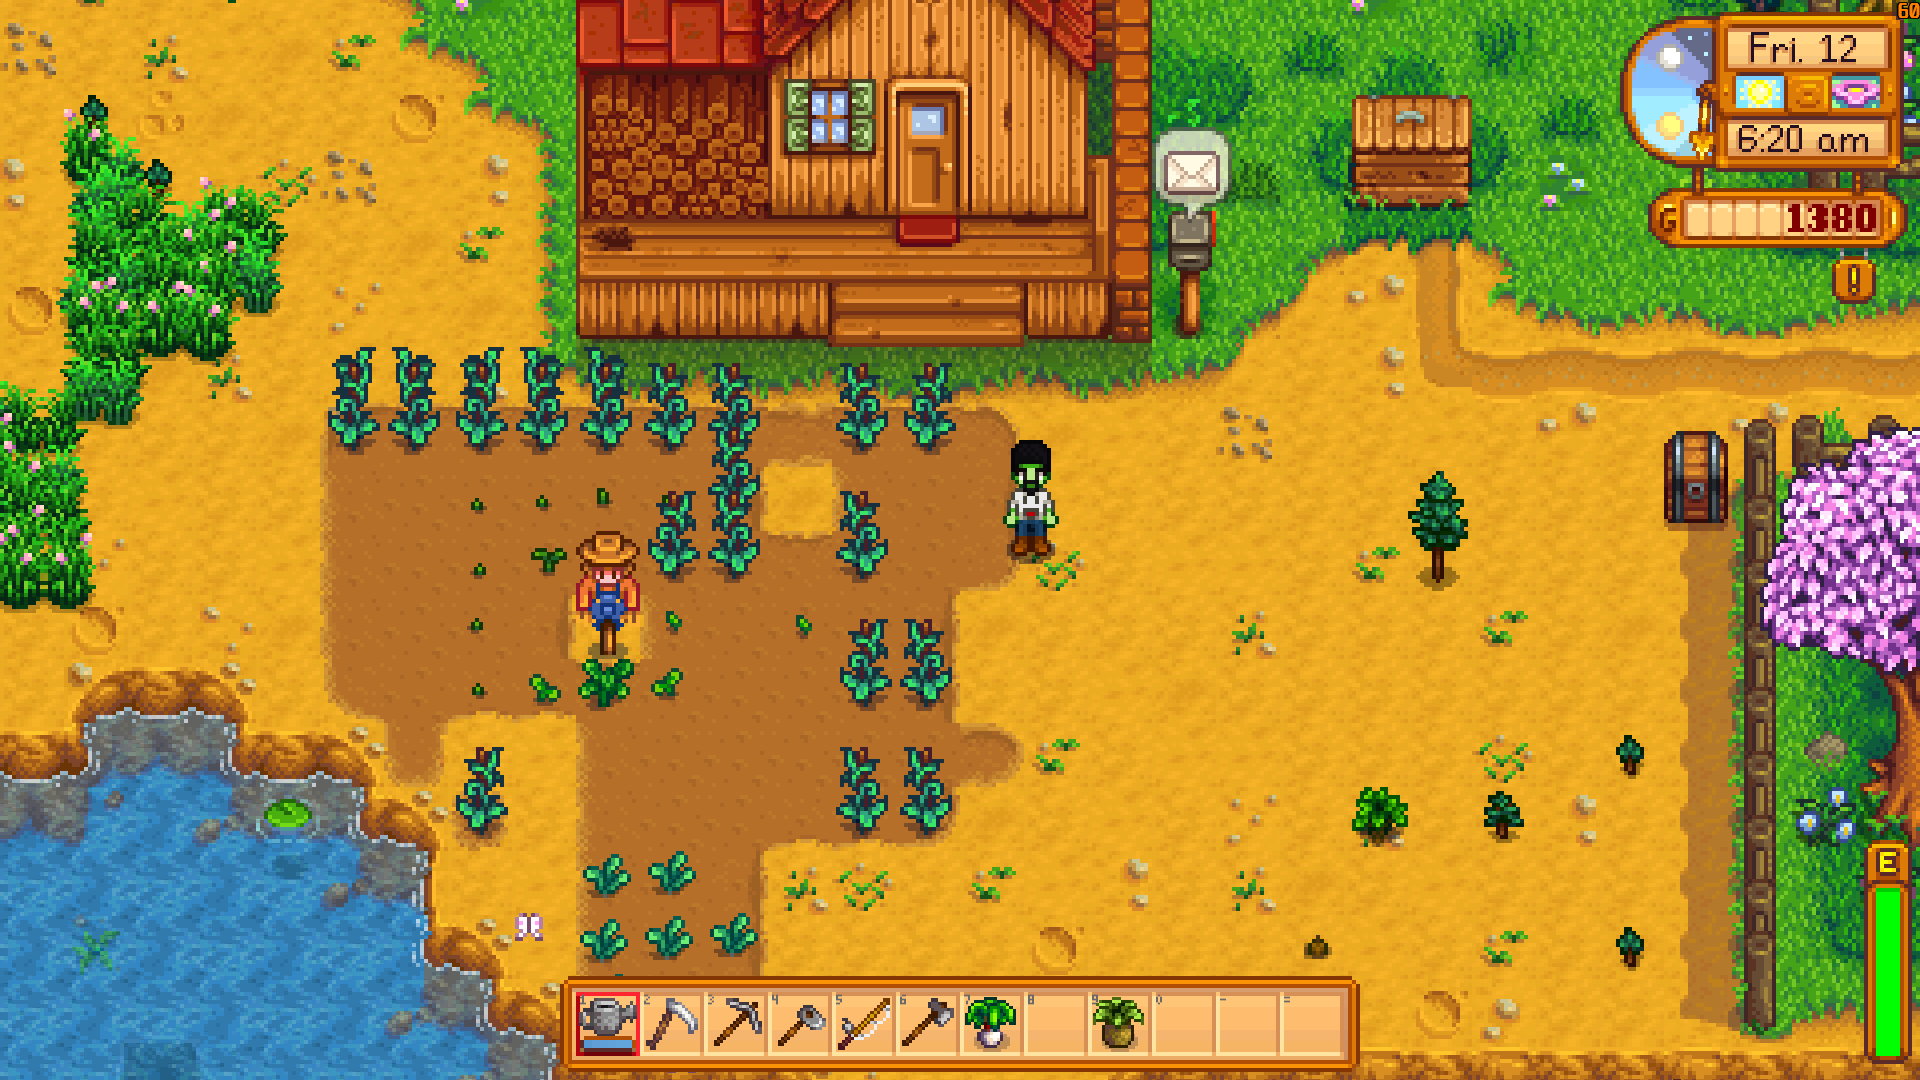
Once in a while I’m rediscovering Stardew Valley*, a very relaxing and charming Farming game. Occasionally, I decide to also play it on Android at the time. Sadly, there’s no inbuilt way of syncing the saves between my (Windows) PC and my Android device, although the file saves are compatible.

There are a lot of tutorials online how to achieve that, so I won’t cover this. I more or less followed this tutorial on Reddit (archive.is link). In short: I symlinked my saves directory on the PC into my Dropbox folder and then use an App, FolderSync, to sync these saves to Android.

Stardew Valley

This worked nicely 90% of the time. Sadly, Stardew Valley on PC crashed every once in a while while saving. The error logs in the ErrorLogs directory made the problem very clear:

Message: The process cannot access the file because it is being used by another process.
InnerException: 
Stack Trace:    at StardewValley.SaveGame.<Save>d__63.MoveNext() in C:\GitlabRunner\builds\Gq5qA5P4\0\ConcernedApe\stardewvalley\Farmer\Farmer\SaveGame.cs:line 344
   at StardewValley.Menus.SaveGameMenu.update(GameTime time) in C:\GitlabRunner\builds\Gq5qA5P4\0\ConcernedApe\stardewvalley\Farmer\Farmer\Menus\SaveGameMenu.cs:line 109
   at StardewValley.Menus.ShippingMenu.update(GameTime time) in C:\GitlabRunner\builds\Gq5qA5P4\0\ConcernedApe\stardewvalley\Farmer\Farmer\Menus\ShippingMenu.cs:line 333
   at StardewValley.Game1._update(GameTime gameTime) in C:\GitlabRunner\builds\Gq5qA5P4\0\ConcernedApe\stardewvalley\Farmer\Farmer\Game1.cs:line 3032
   at StardewValley.Game1.Update(GameTime gameTime) in C:\GitlabRunner\builds\Gq5qA5P4\0\ConcernedApe\stardewvalley\Farmer\Farmer\Game1.cs:line 2913
   at Microsoft.Xna.Framework.Game.Tick()
   at Microsoft.Xna.Framework.Game.HostIdle(Object sender, EventArgs e)
   at Microsoft.Xna.Framework.GameHost.OnIdle()
   at Microsoft.Xna.Framework.WindowsGameHost.RunOneFrame()
   at Microsoft.Xna.Framework.WindowsGameHost.ApplicationIdle(Object sender, EventArgs e)
   at System.Windows.Forms.Application.ThreadContext.System.Windows.Forms.UnsafeNativeMethods.IMsoComponent.FDoIdle(Int32 grfidlef)
   at System.Windows.Forms.Application.ComponentManager.System.Windows.Forms.UnsafeNativeMethods.IMsoComponentManager.FPushMessageLoop(IntPtr dwComponentID, Int32 reason, Int32 pvLoopData)
   at System.Windows.Forms.Application.ThreadContext.RunMessageLoopInner(Int32 reason, ApplicationContext context)
   at System.Windows.Forms.Application.ThreadContext.RunMessageLoop(Int32 reason, ApplicationContext context)
   at System.Windows.Forms.Application.Run(Form mainForm)
   at Microsoft.Xna.Framework.WindowsGameHost.Run()
   at Microsoft.Xna.Framework.Game.RunGame(Boolean useBlockingRun)
   at StardewValley.Program.Main(String[] args) in C:\GitlabRunner\builds\Gq5qA5P4\0\ConcernedApe\stardewvalley\Farmer\Farmer\Program.cs:line 152

Another process was accessing the save file, presumably Dropbox which wanted to sync the changed file. Therefore I searched for a solution to automatically stop Dropbox before starting Stardew Valley via Steam and resuming it after I was done playing. While this is pretty easy in Linux, due to Dropbox offering proper command line access, there’s no such CLI access on Windows.

Kustomize: Wildcard replace all items of a list

Kubernetes, Openshift Comments

Most users of Kustomize know this problem: You have some kind of list and want to replace the same key in every item of the list in an overlay. Let’s say you have a list of ClusterRules:

---
apiVersion: monitoring.googleapis.com/v1
kind: ClusterRules
metadata:
  name: pods
spec:
  groups:
    - name: main
      interval: 30s
      rules:
        - alert: PodCrashLooping
          expr:  max_over_time(kube_pod_container_status_waiting_reason{reason="CrashLoopBackOff", job="kube-state-metrics"}[5m]) >= 1
          for: 5m
          labels:
            severity: warning
          annotations:
            summary: "Pod '{{ $labels.exported_pod }}' CrashLoopingPod"
        - alert: PodNotHealthy
          expr: max_over_time(kube_pod_status_phase{phase!~"Running|Succeeded"}[5m]) > 0
          for: 5m
          labels:
            severity: critical
          annotations:
            summary: "Pod '{{ $labels.exported_pod }}' not healthy"

But you want to have a more lenient alerting time in the development environment, as the stuff there tends to break and isn’t as important as production. Thusly, we want to patch the spec.groups[].rules[].for path. Should be easy, targeting list items with Kustomize patchesJson6902 method is simple. Sadly, wildcard replacement for list items are not implemented in the JSON Patch standard. To replace each value of the list above, we would need to use a dedicated JSON Patch for each list item:

patchesJson6902:
- target:
    version: v1
    group: monitoring.googleapis.com
    kind: ClusterRules
    name: pods
  patch: |-
    - op: replace
      path: /spec/groups/0/rules/0/for
      value: 15m
    - op: replace
      path:/spec/groups/0/rules/1/for
      value: 15m

That’s okay for two list items like in this example, but becomes tedious if you have a list with many. You could use a Helm template, but depending on the rest of your code, that may be overkill.
That’s why I searched for a better way to programmatically patch all items in a list with Kustomize. And I found an - admittedly very hacky - solution. Entering Kustomize replacements. Replacements are the destined successor of Kustomize deprecated vars feature which weren’t powerful enough in any scenario I wanted to use them for anyways. According to the documentation,

Replacements are used to copy fields from one source into any number of specified targets.

That’s not exactly what we want, we don’t have a field…yet. But that’s not a problem, right? The simplest solution is to create a ConfigMap which contains the wanted key:

--- # This CM is only used for Kustomize replacements
apiVersion: v1
kind: ConfigMap
metadata:
  name: alerting-time-replacement-dummy
data:
  for: 15m

Refering to that value in the kustomization.yaml is not difficult:

replacements:
  - source:
      kind: ConfigMap
      name: alerting-time-replacement-dummy
      fieldPath: data.for
    targets:
      - select:
          kind: ClusterRules
          name: pods
        fieldPaths:
        - spec.groups.*.rules.*.for

That properly replaces the values as we wanted:

---
apiVersion: monitoring.googleapis.com/v1
kind: ClusterRules
metadata:
  name: pods
spec:
  groups:
    - name: main
      interval: 30s
      rules:
        - alert: PodCrashLooping
          expr:  max_over_time(kube_pod_container_status_waiting_reason{reason="CrashLoopBackOff", job="kube-state-metrics"}[5m]) >= 1
          for: 15m
          labels:
            severity: warning
          annotations:
            summary: "Pod '{{ $labels.exported_pod }}' CrashLoopingPod"
        - alert: PodNotHealthy
          expr: max_over_time(kube_pod_status_phase{phase!~"Running|Succeeded"}[5m]) > 0
          for: 15m
          labels:
            severity: critical
          annotations:
            summary: "Pod '{{ $labels.exported_pod }}' not healthy"

If you dislike the need to have a permanent useless ConfigMap in your cluster, I have slightly bad news for you: Using patchesJson6902 to delete the ConfigMap is not possible. Therefore, I recommend coupling this dirty hack with another small hack and using a “no-op” Job with a low ` ttlSecondsAfterFinished` value (available since Kubernetes 1.23) using an annotation as a replacement:

---
apiVersion: batch/v1
kind: Job
metadata:
  name: no-op
  annotations:
    # Refer to it via `fieldPath: metadata.annotations.my-replacement-value`
    my-replacement-value: 15m 
spec:
  ttlSecondsAfterFinished: 1
  template:
    spec:
      containers:
      - name: no-op
        # Don't use dynamic tags in production kids, mkay!
        image: busybox:stable 
        command: [":"]
      restartPolicy: Never

The job will be deleted nearly instantly, not leaving any trace in your cluster (although churning away some of your resources for a couple of seconds).
Steam: Fix Software install on every Startup

steam Comments

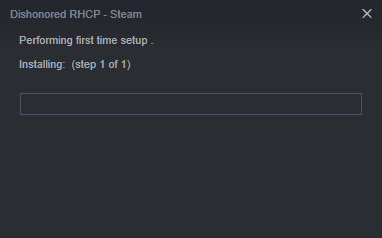
While enjoying first playthrough of Borderlands 2, I encountered an annoyance. Every time I started the game, Steam tried a first-time setup by installing the Visual C++ 2010 Redistributable Package (vcredist). Additionally it also required me to confirm the install process every time, due to Windows UAC. I encountered similar annoyances a couple of weeks later when playing Dishonored.

Some research revealed that this is a very common issue with Steam games, especially older(ish) ones. For some reason the required program installations are not recognised which leads to this installation dialogue before each game start.

League of Legends Steam properties

I did some more digging and found out, that the source often times lies in a missing Windows Registry key. Therefore I created a Github Gist which contains all registry entries I could find: https://gist.github.com/m3adow/721947cf076a0eec5bc2b194e16853d9 Here’s a short instruction how to use the Registry Gist:

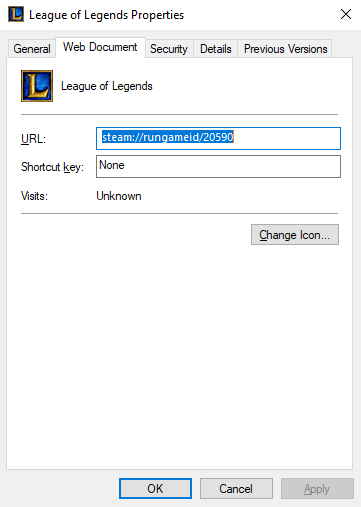
  1. Get the Steam ID of the game which bugs you with the installation on every start. The easiest ways are by checking the desktop shortcut. Right-Click it, choose “Properties” and note down the number in the URL entry after steam://rungameid/. In the picture below that would be 20590.
    League of Legends Steam properties
  2. Copy the Code from my Gist into a new text file. Save the text file with a .reg file extension, steamfix.reg for example.
  3. Change the {{ INSERTYOURAPPIDHERE }} part to the Steam ID of your game and save the file. In my example the replacement would result in [HKEY_LOCAL_MACHINE\SOFTWARE\WOW6432Node\Valve\Steam\Apps\20590].
  4. Double click the file and confirm you really want to apply these changes.

BAM! You’re done. The installation of programs at each start of the game should be history.
If this is not the case please add a comment containing the game, its Steam ID and the software it tries to install every time, so others or I are able to invest more research into it.

Advertisement